Sunday, April 15, 2012

Lavender sachets - a tutorial


How do you capture a fragrance so that every time the wind blows and the fragrance wafts towards you, your mind drifts back to the time when you first held, first walked, first watched, first felt, first realised..... ?
 
Dried lavender buds  bought from a small shop in Marseille.  Such heady perfume wafts out every time I open the packet. More than anything I saw or ate or felt, these buds acutely signify my journey and my solitude in those days.

I needed to find something pretty to do with them because that's what I feel when I look at them and hold them. Pretty and precious.  Imagine the sun, even harsh sunlight, shining on young buds and fresh soft petals squeezing out the moisture - yet, it only manages to concentrate the perfume, which pervades the air wherever it is taken.

Here's a really short tutorial on making sachets to hold fragrant dried flowers.

All you need is some handmade paper, lace, gauzy fabric, and PVA glue. And of course the flower buds or petals of your choice.

Begin with the paper. Here I've used this slightly fibrous gold-embossed ivory paper. I have to tell you that I'm a big hoarder of pretty paper. I picked up one sheet of this paper  about seven years ago for an exorbitant amount (then) of Rupees 80 for one sheet. And I still have some of it.  I love the softness of it, almost like fabric. In fact, you could go with fabric as well if you prefer. Cut out two equal sized shapes from it. For some reason, maybe the colour of the buds, and the mood, I went with hearts. And from one of those shapes, cut out a smaller version of the same shape you chose. So you end up with two hearts, and a heart-shaped hole in one of them.


Then place the whole heart with the reverse side facing you.  Use a length of pretty lace to make a loop and stick it on top.


Use your glue dispenser, to apply some glue along the edge. Use very little of it. Place a teaspoon or less of lavender buds on the middle of this heart shaped piece of paper.


Cut out a small bit of the gauzy fabric and place over the lavender buds. Make sure that this is large enough to cover the heart, but trim away any excess fabric.  If you would like the lavender buds to stay in place, you could consider putting another line of glue just around the buds, so that the gauze sticks closer to the buds and holds them in place.


Next, quickly, take the other heart shape (with the heart-shaped hole) and position it so the hole fits over the lavender buds. Apply more glue lightly if necessary, pressing gently so that all the edges are sealed.


Voila, your little lavender sachet is ready!


I felt the greatest happiness when I saw how pretty it turned out, and how easy it was!   I can't wait to try it with other flower petals.


Monday, April 2, 2012

Travelling storyteller

A lifetime isn't enough to explore all the treasures of the state of Rajasthan. Every time we visit, we always come away with something that stirs our souls and makes us wonder how much more is hidden away in this country of ours.

I've seen this little panelled box, called a kaavad,in emporia in Delhi, sometimes in craft bazaars. It is painted by special artists with wonderfully detailed stories from mythology. It opens out in a particular sequence, and the innermost panel in the centre, usually depicts divine beings. Wandering storytellers used this little shrine to tell stories, going from village to village.


A blank kaavad that I  picked up at a crafts bazaar. Waiting for inspiration.

Last year in the annual bazaar called Dastkar, we were lucky enough to visit a stall run by artists who work on the kaavad. They enthusiastically showed us the different kaavad they had, including stories from the Panchatantra (fables), and some very modern depictions of stories like "educating the girl child". I enquired if they had a blank kaavad, and sure enough, they had one tucked away in their kit bag. It was all primed with white paint and ready to be painted upon.

It took a while to decide what to do with it. I had a completely different idea, but a sudden work trip decided things for us. We decided to use it to depict the story of the camel in Rajasthan. Base coats of red and yellow were applied using acrylic paints. Then my son painted a sun, as the driving force of the Earth. This appears at the highest point of the kaavad.

The kaavad was already primed. So I used base coats of red and yellow acrylic paints. I've seen that these are very typical colours used in kaavad painting.


Anant adding his touch - painstakingly painting the sun at the highest point of the kaavad. This is also a standard feature - and I presume it signifies the driving force of the solar system.

Instead of trying to paint the rather small panels without much practice, we decided to decoupage it using photographs taken by us over the years during our trips to Rajasthan. It took a while to decide the order of the photographs. The driving idea was that the pictures must tell a story individually, and in a sequence, depending on the target audience and the time.  

Finally,after the photographs were decoupaged, it was time for final round of painting using a palette of red, yellow and green was used to fill in some designs.

All done and in place at the World Water Forum in Marseille, March 2012.  The main point was to illustrate the interdependence of the camel-human-environment.

I took it with me on a trip to France recently for the World Water Forum where people were curious to know what it was and keen to see all the pictures. It made a huge change from projecting information on laptops and large screens. And it was handy enough to tuck under my arm and take it wherever I wanted. Another very interesting feature is that I needed to only open out the panels I wanted to use, and restrict myself to explaining those panels in a few minutes. The story of the camel usually began this way because that is the way the legend has been told for centuries. First came the camel. And then God created the Raika to look after the camel. They've walked together for centuries on this soil, with these trees and the hills and the air and water and their spirit. Here is a little tale about this bond.

It also helped in going into detail for professionals, and less detail with visitors who did not have a background in the subject. Somehow it was like taking a little bit of India with me, and I felt very happy and indeed privileged to be able to do that.


Colleagues from Central Asia were curious about this little theatre.

I see a few other uses for blank kaavad - perhaps as a photo album ? I also see it being used for inner work - maybe to illustrate the different panels with mandalas or art work describing one's spiritual journey - leading up to the innermost one? Or maybe being used by children to illustrate some themes for their school work ? Surely it would be a wonderful way to work with our hands and create a tangible object? It would even bear reworking - we could always paint over it and use it for something else.  It would be a beautiful way to appreciate this tradition and the craftsmanship that has carried on for generations.

Saturday, February 25, 2012

Fabric manipulation : Ragamuffin cat

Kathrin of Annekata.com invited crafters to manipulate some fabric and post something about it on their blogs. Although I usually feel more comfortable manipulating different kinds of paper, not fabric,  I decided to give this a go in a moment of madness. Somehow the words "fabric manipulation" sounded so much more exciting than just working with fabric, or needlework or ...whatever.

And since I was already out of my comfort zone...I decided to plunge in fully and take up some kind of needlework. Needlework? If there was a person who could be called all thumbs it would be me. Just sewing on a button takes me longer than the average person because either the thread would snag on another button or get knotted up or...really anything could happen. This is strange because I have done my share of cross-stitch and crochet when I was very young. I guess it just means needing  regular practice at this.

Anyway, on to my tiny little contribution to the cause.

First I wrote the lyrics for a song "Let's manipulate" to get into the spirit! 

I've written earlier about some of the drawings my son, now eleven, made when he was younger. In particular a simple crayon sketch of a cat that he made when he was about four, enthrals me every time I look at it. I think that it embodies both simplicity and character in such few strokes.


I decided to convert this sketch of his into a small embroidered cat. I just decided to run with what I had at home, and used a piece of thin cotton fabric, onto which I traced the design. I used four strands of really thin white cotton thread because I did not have white embroidery thread.


My original plan was to do white on white embroidery and have the cat peep out from beneath some translucent fabric.  I tried placing it beneath some fabric I had  and realised that it really wasn't visible and as mysterious and dramatic as I intended it to be.

So I changed plans a bit. I felt the cat needed some character in fabric and decided to snip around the outline leaving a small margin, and frayed it. I deliberately left the thread uneven so it ended up looking a bit like a friendly ragamuffin of a cat. Placed against a hot pink fabric I thought it looked quite cute. If you'd shown me something like this a few days ago and asked me if I could make something like this I'd have dug in my heels and refused to do so.  Of course, the chain stitch is pretty ragged, the blue of the outlining pen shows through...  if I had to do it again, I would have planned better and definitely done better.


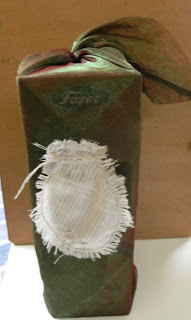
I tried combining it with furoshiki, and this is how it looks.


The point of this though is essentially going out of comfort zones, examining things, looking at them in a new light, deconstructing what you see around you...and doing what is possible with the materials you have around. Suddenly something falls into place, and new directions emerge. It's always about potential.

Thanks Kathrin for the inspiration!

Please visit Kathrin's website for a post on her fabric manipulation project as well as links to the posts of the crafters who participated.


Related Posts Plugin for WordPress, Blogger...

Monday, February 6, 2012

Chakra Explorations – Third Chakra


Around seven years ago, I discovered a recipe for papier-mache paste on the Internet.  Yes, some of the most useful things in life ARE  free!  Anyway, I went on a papier-mache spree after that,  with Anant joining in with his cute little starfish fingers, both of us enjoying the sensation of tearing up paper and dipping fingers in this squishy paste. I don’t quite remember if he tried eating some of this paste….it wouldn’t have mattered, as it was just flour, water and sugar. Some of our experiments were tucked away safely in a cupboard all these years. I was happy to see that they are still intact, with some weathering – the least that can happen in this climate. 

Most of these experiments involve layering bits of newspaper, with a final layer of finer paper.  In the case of this doll made by Anant, it was wholly made of newspaper – bits of the print can be seen through the paint. 

Anant's first experiment with papier mache. Newspaper strip papier mache, poster paints.


 For the mask “Coffee Junkie” (left)  I used coffee filter paper and bits of paper from coffee packs, with jute for detailing. The coffee filter paper seems to have some kind of adverse reaction and become a bit patchy.   However, the mask “Found” with a final layer of rice paper seems to look  naturally weathered. I have to say I’m partial to this rice paper from Nepal, I’ve been hoarding a few sheets like they’re gold.

Left: "Coffee Junkie", made from coffee filter paper (unused) and jute. Right: "Found" newspaper layers with final coat of rice paper.

In sharp contrast to previous years, this time I wanted to try something more ordered using a single layer of pre-cut pieces of paper, rice paper, to make something to commemorate the Third Chakra that we were studying in our group explorations. 

Actually I wanted to work on an egg.  A thin white paper eggshell, in which runny egg white would be dripping all over, within which would be a beautiful hard yellow yolk, representing the colour of this Chakra. This yolk would be intact. I had it all sorted out in my mind.

I set to work, first making a small template, triangular in shape, using it to cut out pieces of the rice paper.  There was something meditative as always, repetitive actions help calm the mind, and focus on the task at hand. With a whole lot of shapes cut out, I  cut out a central disc around which I could arrange these pieces concentrically, overlaying them, and using the famous  paste to stick the pieces together.

The delicate strength of the rice paper is beautiful to observe.

I used an egg-shaped clock for reference as I worked. 

Somewhere along the way I lost the plot. A half eggshell it was definitely not. I still kept at it, hoping the shape could be controlled at each new layer of the concentric form I was building up. When my husband asked me if I was making a pineapple, I realized that it definitely was not working.  By then, the “form” was more or less complete.

I turned it around, kept it upside down, right side up, sideways, peered into it. And decided to run with it anyway. By a happy accident, it actually ended up looking like a flower!


Looking inwards. Another flower?

When I look at it, I know it’s not perfect. There are tiny pinholes where I haven’t layered the pieces properly. The paper is thin like skin, and its natural texture allows light at different levels, so some parts are light and others slightly dark. It still looks beautiful. And deep inside I see the centre, intact, despite all the imperfections in this form. It holds the form together. 


I felt that this process itself contained a message. Sometimes I had to make do with what I had. Sometimes things didn’t work out according to plan. Sometimes I had no plan.  There are imperfections, in my physical body, in the way I might think at times, in my actions. Yet, I feel the centre is untouched and pristine despite the blows. It is still holding out. I felt an impishness come over me when I saw the image of this form on the computer, maybe it was the ghost of my youth in a sense, cocking a snook at the future.  The image reminded me of a container like a glass on the underside of which you have the manufacturer’s imprint and some information about the quality.  I added three words to this image (see below). They reflect what I feel at this instant in my life.

Still the sun shines through.


Click to get an enlarged view.


Sunday, January 8, 2012

In quest of a colour

A painting by Paul Gauguin "When will you marry" from paintings done in Tahiti by the artist. I love the warmth of the orange and red.

Champaka flower (Michelia champaca).  Mixed media. Paper, wire and floral tape. Painted with acrylic colours. Namitha (January 2011)        


Champaka flower juxtaposed on a b/w family photo.

In my online group explorations on the Chakras, I try to relate what I learn to my life. Although it isn’t part of the assignment, I like to  do things with my hands and make something that signifies what I feel.  It’s both meditative and really enables me to feel much more deeply and focus on the learnings.

The second chakra’s colour strikes a chord with me above all else. I associate the colour orange-ochre  with spirituality above all else. It is the colour of idols of gods like Hanuman or Ganesha in temples especially in the north of India. Then I associate the colour with the earthy warmth felt in the Tahiti paintings of Gauguin, in particular the painting appearing first in this post. It's titled “When will you marry” and I have a tiny copy of this in my home - it appeared in a diary and I hoarded it for many years before decoupaging it onto a wooden chest in 2008.

For an image for this chakra, I tried to imagine what a Gauguin painting would signify to me as someone living here in India… and the hues translated in my mind into a flower. I thought of a flower which would signify tropical  earthiness,   and also reflect this colour palette, a distinct orange-ochre permeating the scene, and all the things that go with it in my mind. 

Only one flower emerged after some thought. It is so deeply connected with my home town Bangalore (there’s even a road named after this flower). This is the flower Champaka (Michelia champaca) – it is a offered as a flower in worship, worn in the hair by women sometimes either in S. India or Bengal. It is mentioned in ancient texts and also appears in sculptures adorning the hair of women. It has a perfume that grows on you – even one flower is enough to permeate the air with its scent. Interestingly, when I read up a little more about this flower, I learnt that it is used to create perfumes – it is one of the notes in the perfume “Sira des Indes” (Jean Patou) and Ormonde Jaynes “Champaca” which no doubt are sold by the milliliter for a lot of money. I found this absolutely riveting information – of the two sides of the coin or this colour  – spirituality and materialism – that is to me at least, the overpowering learning of this second chakra. 

I couldn’t readily obtain a flower here, so I made one out of paper.  

I studied pictures of the flower, and remembered having  held them, inhaled their fragrance. I know how the petals lay when you hold them so I worked towards that.  Based on this, I chose  drawing paper torn from my son’s old drawing book over anything more textured. I painted the exact shade I wanted of both ochre and green. Then cut out the shapes of the petals and a leaf.  It’s not exactly to scale, although I  am certain that full bloom could be as large as this (This paper flower is about 4-5 cm from base of flower to tip).

Champaka petals. An initial layer of burnt sienna painted over with yellow
I painted  over the petals and leaf again to cover any white. Then I  assembled the whole thing, using a bit of wire and floral tape.  Ages ago, I attended a small session held in a bookshop in Bangalore. A young girl taught us how to make flowers out of fabric. It was just something so random, and free for the visitors to the bookstore to top it all. In half an hour I learnt how to make flowers, and I can’t even recall the countless times I’ve used this technique for different kinds of flowers, and also taught it to others. It reminds me how important it is to teach something to someone without any monetary consideration, just for the sake of spreading some joy.

Anyway, I selected an old photograph of our family. It was the not the actual photograph I wanted, but since the other one was not available here in Delhi, I went with this one.


I juxtaposed the Champaka flower against the photograph. It's of the four of us taken ages ago of my parents and my younger sister and myself in front of my grandparents house in Bangalore. I like how beautiful and relaxed my parents look. My sister looks a lot like my son did at that age, and it's amazing how family resemblances carry on. As for me, there I am looking as serious and intense-eyed as ever. I like the effect it has of bright light permeating the picture from the right side.

It’s just very symbolic, as I believe the second chakra has influenced us as a family deeply – issues of kinship-friendships-judgement-trust-finance. Although hard lessons were learned through the vicissitudes of life, they are important lessons, and I move forward knowing this, and knowing too that there were some important beliefs and ethics we clung to, and if we had to do all over again, we’d probably not do much differently. It’s important to be clear about what you won’t do  …at times it’s much more important than knowing what you will do or can do.  


2012

I wish you and your families peace and joy in 2012. Thank you for visiting my blog this past year. I will try my best to update more regularly this year. Best wishes-Namitha